(E) Colorpicker
Goal: I will learn how to use Qt Designer to implement a graphical user interface.
Instructions:
Retrieve the code template: template/11/colorpicker_designer ->
student/11/colorpicker_designer,
if you did not do so while reading the previous material sections.
Before this exercise, it is important that you have read the previous material sections. Especially the section concerning signals and slots uses Colorpicker template as an example.
When you choose to handle the file mainwindow.ui,
generated by Qt Creator, you end up in Qt Designer, where
it is convenient to design the appearance of the user interface without
writing a single line of C++ code.
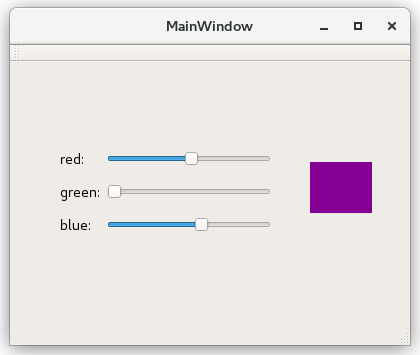
In this case, the user interface is partly implemented beforehand, and it looks like this:
Your task is to add the missing spin boxes, when the result should look something like this:

You can do the task in the following steps:
- Select spin box from the list of standard widgets and drag it in the correct place in the user interface. Repeat this three times.
- For the added widgets, give exactly the names:
spinBoxRed,spinBoxGreen, andspinBoxBlue. Due to automated tests, it is important to use these names.- The widgets in the window are objects in C++. You can select these objects for examination in the object window on the top right corner of Qt Designer, and you can edit the attributes of the objects in the property editor located in the bottom right corner. You should note that the property editor also has a search function.
- Connect the sliders and spin boxes in pairs with each other so that
a change in the value of one affects the value of the other.
Use always the signal
valueChanged(again due to automated tests). There are three possible ways to do this:- Move to Edit Signals/Slots mode. Move the mouse cursor to the component with the signal you want to connect to something else. When a red box is formed around the component, left-press the mouse while moving to the component to which you want to connect the signal. You can now choose the signal and slot you in the window popping open.
- Move to Edit Widgets mode.
With mouse choose the component with the signal you want to connect.
When pressing the right mouse button, it opens a menu, from which
you should choose
Go to slot .... This generates an empty slot function in the classMainWindowfor processing the signal. You can write any C++ code in the body of the function. In this case, you should call the slot function of the connected component.- This way can cause warnings, especially in Windows computers. However, warnings should not prevent the program to pass automated tests.
- Write the connections in C++ program code like has been done in
the constructor of
MainWindow.
- Move finally to the file
mainwindow.cppand set minimum and maximum values for the added widgets.
A+ presents the exercise submission form here.