JavaFX Library
JavaFX is a free library for implementing graphical user interfaces in Java.
JavaFX was developed to replace the outdated AWT and Swing libraries and it was a part of Java SDK for a while. However, JavaFX was outsourced by Oracle as the OpenJFX open source project, when the Java 11 was released.
Oracle’s JavaFX tutorial is still a useful resource when implementing JavaFX programs. The documentation of the OpenJFX project provides more information. For example, instructions of how to use JavaFX with different programming tools are given.
Although JavaFX is available as a separate library,
it is easiest to create a JavaFX application with a project management system and an IDE.
We work on this course exactly in this way: NetBeans is used to create a Maven project
to whose pom.xml NetBeans automatically adds the necessary definitions for the JavaFX
dependencies and plugins.
In the course material, NetBeans’ JavaFX projects are mainly non-modular and are “simple”
meaning that the projects do not use the FXML markup language. In NetBeans, this type
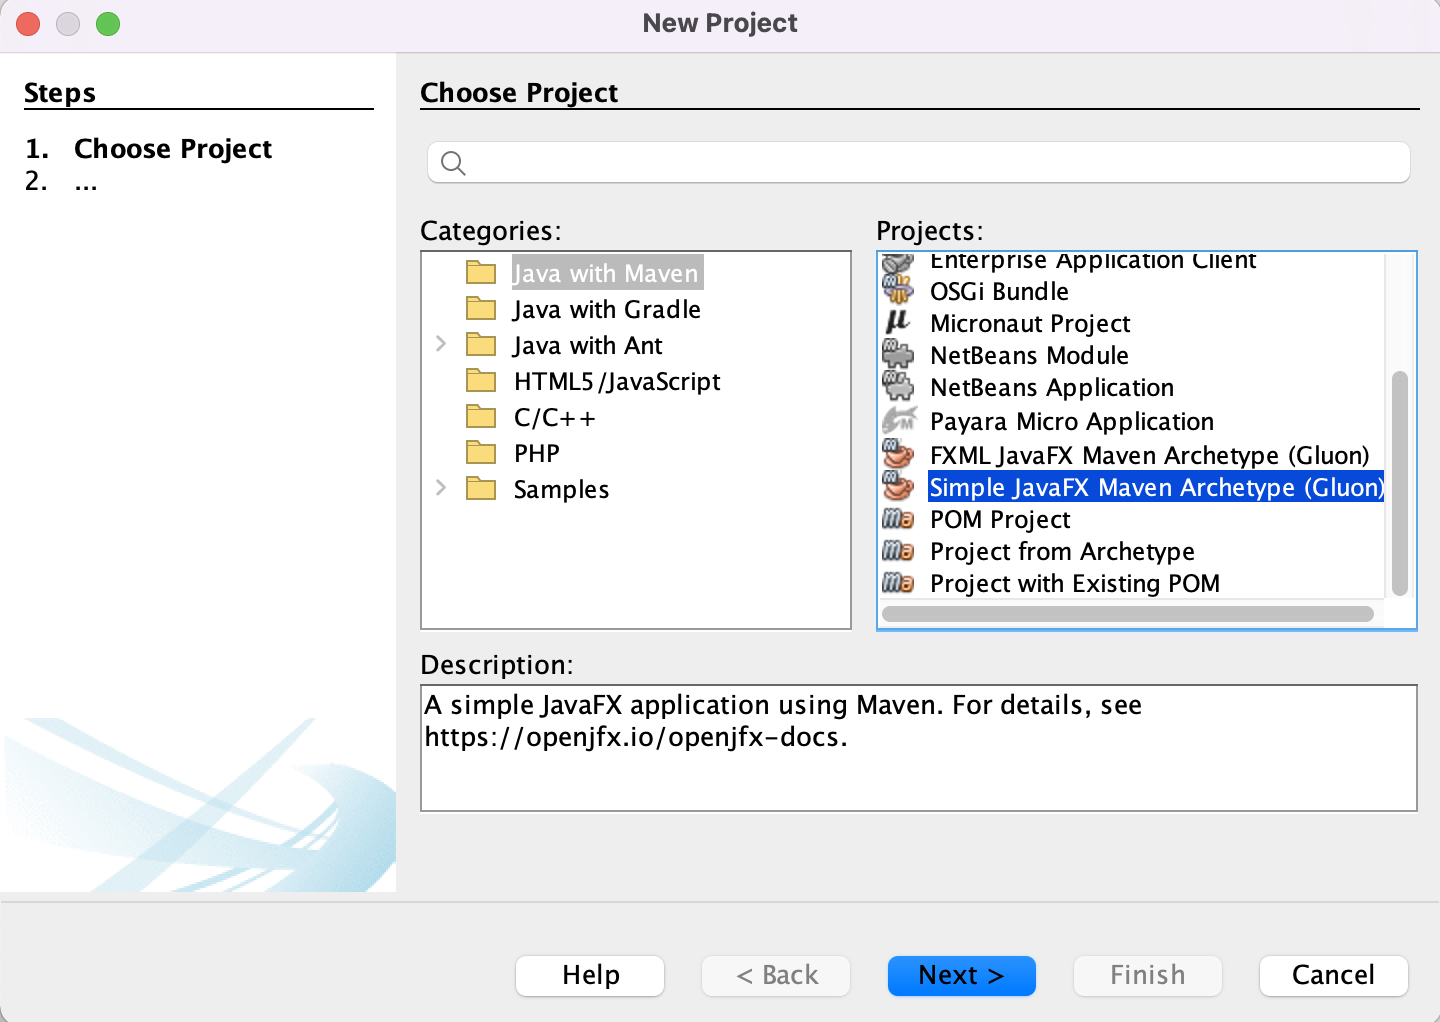
of JavaFX programs can be implemented by selecting New Project | Simple JavaFX Maven Archetype.

Creating a simple JavaFX project in NetBeans.
When creating a JavaFX project in this way with NetBeans, give at the Additional creation properties
location value 17.0.1 for the javafx-version field and value 0.0.8 for
the javafx-maven-plugin-version field. These are required by the automatic tester.
Use these values also when creating a JavaFX project with a different IDE or without an IDE.
You may apply newer versions, if the task does not have automatic testing.
The pom.xml of a JavaFX project has a dependency for JavaFX. For example:
<dependencies>
   <dependency>
      <groupId>org.openjfx</groupId>
      <artifactId>javafx-controls</artifactId>
      <version>17.0.1</version>
  </dependency>
</dependencies>
This dependency suffices in simple JavaFX projects, because Maven can deduce all the other needed dependencies by itself.
In addition, a definition for a JavaFX Maven plugin is needed in pom.xml. For example:
<plugins>
    <plugin>
        <groupId>org.openjfx</groupId>
        <artifactId>javafx-maven-plugin</artifactId>
        <version>0.0.8</version>
        <configuration>
            <mainClass>package.MainClass</mainClass>
        </configuration>
    </plugin>
</plugins>
The mainClass attribute contains the class that defines the JavaFX program.
For example, the this attribute should have value example.App in the project file
of the example JavaFX program shown below.
Please, note that NetBeans creates the nbactions.xml file for the definitions
necessary to run and debug a JavaFX project in NetBeans. A programmer does not
usually need to worry about or modify this file.
The JavaFX Maven project, created with NetBeans or otherwise, is run from
the command-line with the command mvn javafx:run.
Although NetBeans populates an initial class directly, a very simple self-made JavaFX program is shown below:
package example;

import javafx.application.Application;
import javafx.scene.Scene;
import javafx.scene.control.Label;
import javafx.scene.layout.StackPane;
import javafx.stage.Stage;


/**
* JavaFX App
*/
public class App extends Application {

    @Override
    public void start(Stage stage) {
        // Setting the main window with a title
        stage.setTitle("All the world's a stage");
        // Show the main window
        stage.show();
    }

    public static void main(String[] args) {
        launch( args );
    }

}
Let us break the program structure into peaces to see what makes a JavaFX program.
The main class of a JavaFX program derives from the javafx.application.Application class.
When the program starts the program execution goes forward on the main class level:
An object is created from the
Appclass.The
init()method that initializes the state the program needs to have before execution is called automatically. For example, this method can create objects needed by the program.The
start(Stage stage)method that acts as the starting point for the program, is called automatically. The method receivesjavafx.stage.Stageobject that defines the program main window as a parameter. Calling theshow()method for thestageshows the window on the screen.The program stays here and listens for the events. The main class waits here for a program closing event, that is, either a call for
Platform.exit()or that all windows are closed withimplicitExitforPlatform.The
stop()method is called automatically.
It is important to note that start() is abstract in Application and must be implemented in App.
Empty implementations are provided for init() and stop().
Our program does nothing so far. Let us add functionality to the window.