Java IDE and the First Program
Java is an object-oriented programming language, syntactically close to C++.
As mentioned earlier, modern programming is typically done using an integrated development environment due to their versatility and functionality that helps boost coding productivity. Programmers are rather free to choose their own programming tools, which makes the development environment a matter of taste. Experience with certain tools also has a major role.
As the example environment on the course we will be using NetBeans. NetBeans is available on all operating systems licenced under an open source license (Apache 2.0). The installers for NetBeans can be found here.
Install JDK (see the previous chapter) before installing NetBeans. The NetBeans installer should be able to find JDK automatically during the installation. You can change the JDK location in the installer, but this is usually not necessary. Activate the Java SE plugin (Tools | Plugins | Installed) before you start writing Java programs.
Let’s go!
As our first Java program we will implement a first program classic
originally by Kerningham and Richie - the Hello World! program. Its
advantage is that it is a good way to get to know both the basic syntax of
the language and the basic use of the development environment. In
addition it offers a way to check that the development environment is
set up correctly and is up and running.

At this point only one code file is needed to implement the program. Hence we will start by using NetBeans simply as a code editor. Open NetBeans. A new file is created either by clicking the New File icon or selecting File->New File from the menubar.
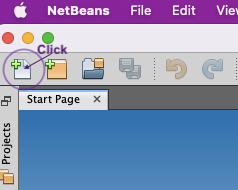 or
or 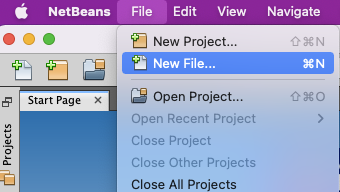
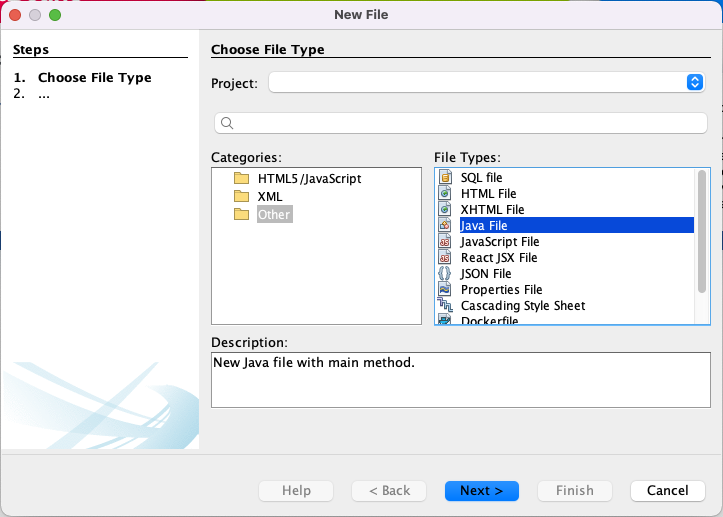
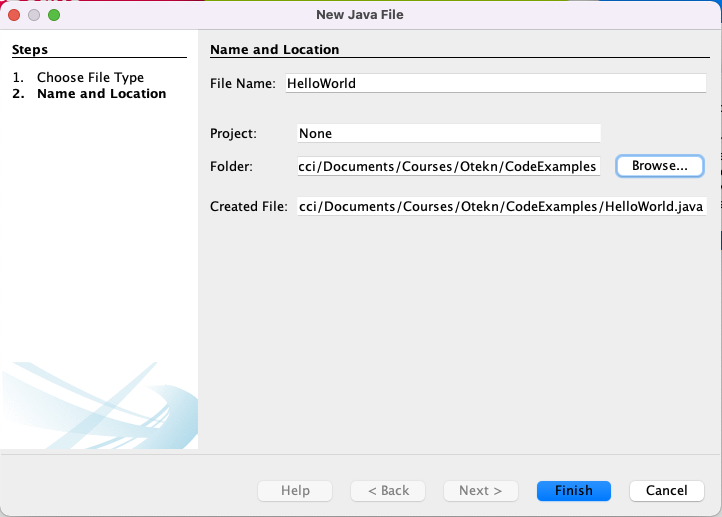
Then you should choose Other->Java File->Next. Name the file and select a suitable folder for it. Java source code
files should always be named after their main level class (or interface). For example, if the main level class
is called TheBestClassEver, the code file is named TheBestClassEver.java. The letter case matters;
theBestClassEver.java does not work as the first character is in lower case.
It is smart to place the code files written during the course into a specific folder so that they are
easily found when needed. There is no need to define a project here.
Finally click Finish to create the file and a handy code base as its contents.
The code base created is the following:
/*
 * Click nbfs://nbhost/SystemFileSystem/Templates/Licenses/license-default.txt to change this license
 * Click nbfs://nbhost/SystemFileSystem/Templates/Other/File.java to edit this template
 */

 /**
  *
  * @author Terhi
  */
 public class HelloWorld {

     /**
      * @param args the command line arguments
      */
     public static void main(String args[]) {
         // TODO code application logic here
     }
 }
Recommendation: String args[] → String[] args
The code base created by Netbeans defines the main-function’s parameter using the C-style array
syntax String args[]. This deviates from the widely adopted Java convention that array brackets
should be placed at the end of the type and not the name: String[] args. All code examples in this
course will use this latter style with arrays. And so should also you!
Java Basics video (duration 44:26).
Java Basics
Comment blocks in Java are like in C++, i.e. the familiar // a line of comment are line comments that run from // until the end of the line.
A block comment is surrounded by /* */. Block comments cannot be nested and the asterisks in the beginning of the lines are to improve readability.
A comment block starting /** is a Javadoc comment block that will be covered later. It is possible to create interface documentation directly from code with Javadoc.
The program code is written inside a class, and in every Java program there is at least one class.
A class is declared with the key word class followed by the name of the class (HelloWorld). In addition there is
an access modifier, typically public. This is followed by the body of the class {} where the implementation of
the class is written.
The basic structure of a Java class is:
public class Name {
    <member variables, sometimes called attributes or fields>
    <member functions, also called methods>
}
Every Java program needs to contain a method called main, i.e. the main program. It is always of the form public static void main(String[] args). Let’s take a short look into the different parts of this incantation:
publican access modifier that defines who can call the method and from where it can be called. To enable Java to start the main program the main method must be public.staticdefines the member function as static. This means that the main function can be called without creating an object from the class.voidreturn value of the method. The main program does not return anything and thus the return value isvoid.mainthe name of the method. This method is not called from the program. Java starts the main program by itself instead.String[] argsthe command line parameters for the program, i.e. an array of character strings. Let’s get back to this a little bit later.
Let’s then write some functionality to our program. We want to print the text “Hello World!” onto the screen. The functionality is written inside the function block of the main program.
For printing, a suitable class from the package java.lang is needed. Such class is called System.
For the purposes of the language java.lang
defines a basic set of classes
(e.g. System, String and Double) and it is available
in all Java programs automatically. We will get back to packages later.
Now, write System.out inside your main. You will notice that NetBeans helps you with finding the correct method.
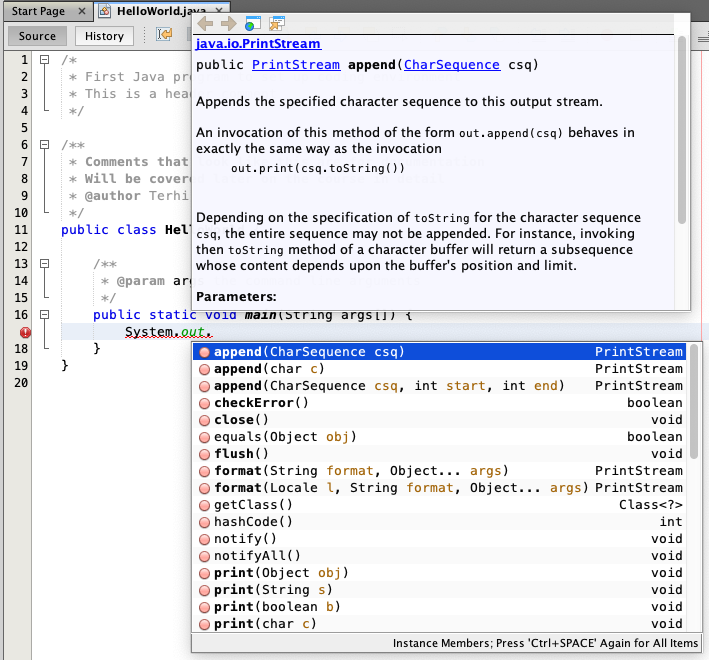
Select from the methods NetBeans suggests the one suitable for printing a line of text as a character string and have it print the required text. The syntax for character string literals in Java is the same as in C++ meaning "this is a string literal".
When you have added the correct method call into your code, i.e. System.out.println("Hello World!"), you can compile
and run the program. A single file can be run in NetBeans by selecting Run->Run File. However, it is important to be able to compile and run programs on the command line (Terminal or Console in Linux, Terminal in macOS and Command Prompt or PowerShell in Windows) as well.
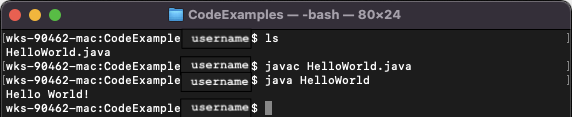
On the command line, go into the folder you instructed NetBeans to save your code in. Running a Java program
consists of two steps. First the source code is compiled into bytecode. Then the bytecode is executed with
an interpreter in the Java Virtual Machine (JVM).
The JVM makes Java portable between different platforms, i.e. the same bytecode is executable everywhere where the JVM is available. We will take a closer look at the JVM later.
The command javac file.java, for example javac HelloWorld.java compiles the source code into bytecode. After a successful compilation a bytecode file file.class, for example HelloWorld.class, is created.
The bytecode is interpreted by giving the name of the class to the interpreter with java file, for example java HelloWorld.