- COMP.CS.140
- 11. Functional Program
- 11.1 (Unit) Testing
- 11.1.3 Testing Framework JUnit
Testing Framework JUnit
Unit tests are best written using a test framework.
For Java, a such framework is JUnit which is intented for test driven development.
The latest version, JUnit 5, is in the package org.junit.jupiter.
The earlier versions JUnit 4 and JUnit 3 are in packages org.junit and junit.framework, respectively.
The user guide for JUnit is available online: JUnit User Guide.
A JUnit test fixture is a Java object.
In the code of the test class, the test methods are annotated with the @Test annotation.
If needed, it is also possible to define a method to execute before (or after) each (or all) of the test methods with the @BeforeEach (or @AfterEach) and @BeforeAll (or @AfterAll) annotations.
A list of JUnit annotations.
The basic structure of a JUnit test file is:
import org.junit.jupiter.api.AfterEach;
import org.junit.jupiter.api.AfterAll;
import org.junit.jupiter.api.BeforeEach;
import org.junit.jupiter.api.BeforeAll;
import org.junit.jupiter.api.Test;
import static org.junit.jupiter.api.Assertions.*;

public class MyClassTest {
    @BeforeAll
    public static void setUpClass() throws Exception {
        // Actions executed before the first test case
    }

    @BeforeEach
    public void setUp() throws Exception {
        // Actions executed before each test case
    }

    @Test
    public void testMethod() {
        // Code for testing a method
    }

    @AfterEach
    public void tearDown() throws Exception {
        // Actions executed after each test case
    }

    @AfterAll
    public static void tearDownClass() throws Exception {
        // Actions executed after the last test case
    }
}
In addition different conditions can be defined for running the tests, tests can be parameterized, a specific execution order can be defined, a specific amount of executions for a test can be defined etc.
An example of a test class testing the Date class:
public class DateTest {
    @Test
    public void testGetYear() {
        // print the name of the method
        System.out.println("getYear");
        // create an instance of the tested class
        Date instance = new Date(2022, 2, 28);
        // define the expected output
        int expResult = 2022;
        // fetch the state of the tested instance
        int result = instance.getYear();
        // check is the fetched state matches the expected output
        // if not  assertEquals throws AssertionError
        assertEquals(expResult, result);
    }

    @Test
    public void testGetMonth() {
        System.out.println("getMonth");
        Date instance = new Date(2022, 2, 28);;
        int expResult = 2;
        int result = instance.getMonth();
        assertEquals(expResult, result);
    }

    @Test
    public void testGetDay() {
        System.out.println("getDay");
        Date instance = new Date(2022, 2, 28);;
        int expResult = 28;
        int result = instance.getDay();
        assertEquals(expResult, result);
    }

    @Test
    public void testToString() {
        System.out.println("toString");
        Date instance = new Date(2022, 2, 28);;
        String expResult = "28.02.2022";
        String result = instance.toString();
        assertEquals(expResult, result);
    }

    @Test
    public void whenExceptionThrown() {
        System.out.println("whenExceptionThrown");
        Exception exception = assertThrows(DateException.class, () -> {
            new Date(2022, 2, 29);
        });

        String expectedMessage = "Illegal date 29.02.2022";
        String actualMessage = exception.getMessage();
        System.out.println(actualMessage);
        assertTrue(actualMessage.contains(expectedMessage));
    }

    // making a parameterized test
    // input is given with the method intProvider
    @ParameterizedTest
    @MethodSource("intProvider")
    void testLegalDates(int year, int month, int day) {
        System.out.println("isLegalDate");
        assertTrue(Date.isLegalDate(day, month, year));
    }

    // A method returning the parameters for the test as a  stream
    // In addition to a stream any collection such as List could be used
    static Stream<Arguments> intProvider() {
        return Stream.of(
            arguments(2014, 2, 14),
            arguments(2020, 5, 30)
        );
    }
}
In order to compile and run your code, you need have the JUnit packages. The easiest way to work with these packages is to let an IDE to manage them automatically.
However, if you decide to configure the use of JUnit in the project by yourself, you need the add the dependencies
shown below to the pom.xml file. The first three definitions are for the JUnit libraries. Please, note that
the repetition of the version number could be avoided by using the dependencyManagement element. The last
definition is for the Surefire plugin that is needed to run the tests of the Maven project.
<dependencies>
    <dependency>
        <groupId>org.junit.jupiter</groupId>
        <artifactId>junit-jupiter-api</artifactId>
        <version>5.6.0</version>
        <scope>test</scope>
    </dependency>
    <dependency>
        <groupId>org.junit.jupiter</groupId>
        <artifactId>junit-jupiter-params</artifactId>
        <version>5.6.0</version>
        <scope>test</scope>
    </dependency>
    <dependency>
        <groupId>org.junit.jupiter</groupId>
        <artifactId>junit-jupiter-engine</artifactId>
        <version>5.6.0</version>
        <scope>test</scope>
    </dependency>
</dependencies>
<build>
    <plugins>
        <plugin>
            <groupId>org.apache.maven.plugins</groupId>
            <artifactId>maven-surefire-plugin</artifactId>
            <version>3.2.5</version>
        </plugin>
    </plugins>
</build>
NetBeans
The Junit framework is readily-available in NetBeans via the Java SE plugin. Each Maven project
created with NetBeans has the src\test\java directory for the JUnit test classes and their
packages. It is assumed below that we are working with a Maven project.
A JUnit test is created in NetBeans as follows:
Click the class to be tested in the
Projectstab. Make sure that you have activated the correct file, because otherwise the next step may not work.Create a test class by selecting
Tools | Create/Update Tests.
A test class can be also created by selecting New File | Unit Tests | Test for Existing Class. Please, make sure to
enter a package, if the class to be tested in in one. It is easiest to select the package and the class to be tested
using the Browse button.
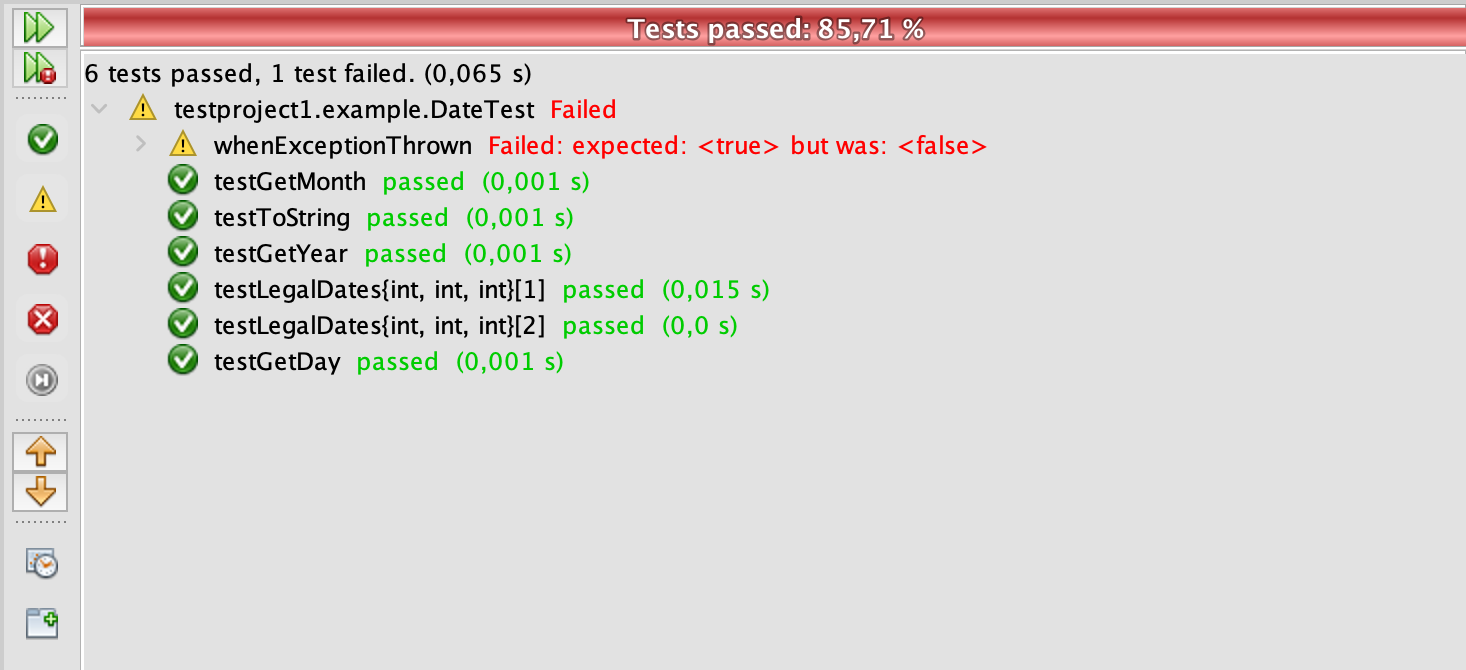
You can run all tests by selecting Run | Test Project. The same functionality is available from
the project header in the Projects tab. The image below shows an example of the NetBeans’s test outputs
in its Test Results tab.
NetBeans automatically updates the pom.xml project file with the JUnit dependencies to
reflect changes needed for the testing. Unfortunately, NetBeans does not add the definition for
the Surefire plugin in pom.xml. You need to modify pom.xml for this part by yourself,
if you want to run the tests with Maven also from the command-line.
Visual Studio Code supports JUnit Jupiter and the JUnit Platform via the Java Test Runner extension which is installed by default as part of the Java Extension Pack.

The result of the tests and the reason if failed is shown for each test.