Your first HTML Document
It’s time to create your first HTML document.
The Most Amazing Lasagna Recipe
Download the recipe.txt
Download also the stylesheet
and the image
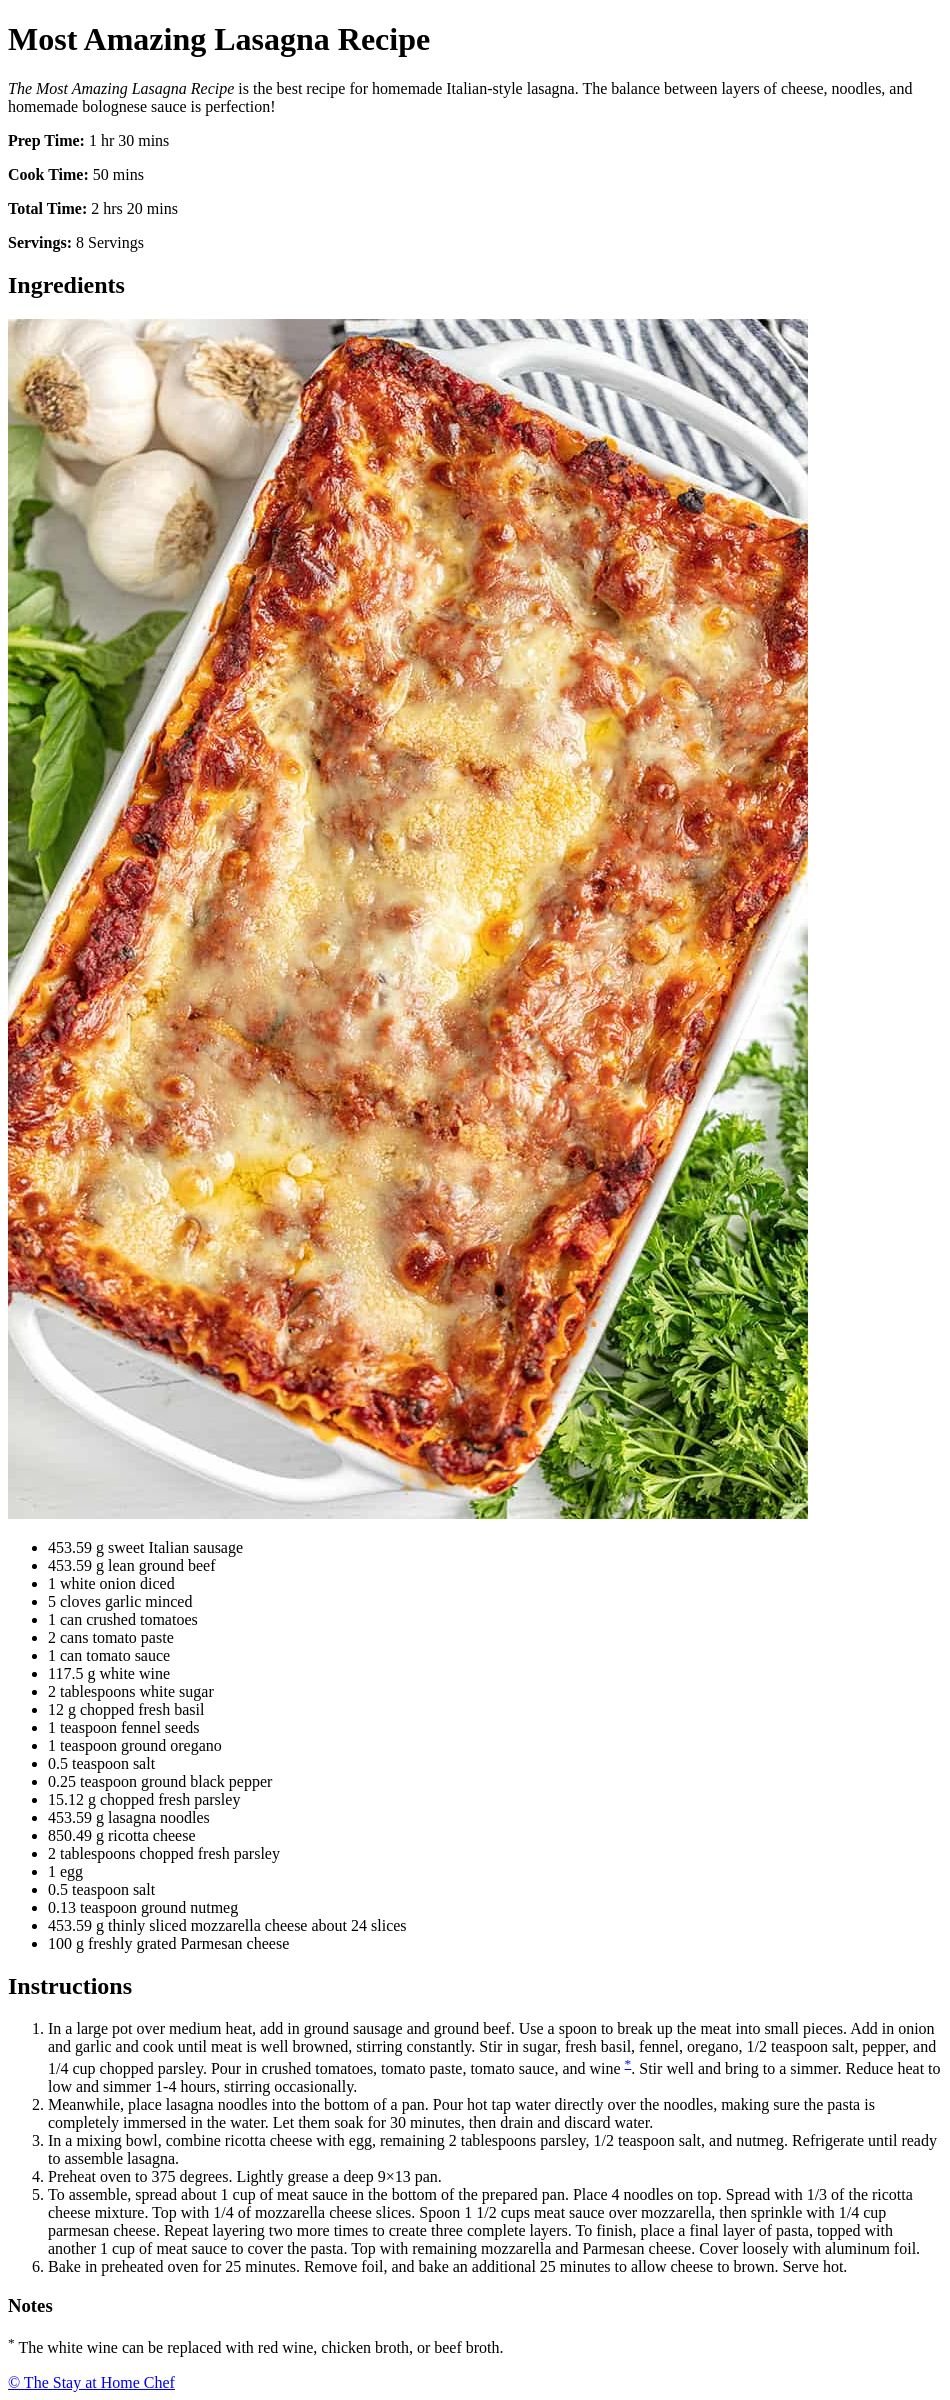
What you’re going to build
In this exercise you are going to format a plain text file to an HTML page. The image below shows the result you are aiming for.
How you’re going to build it
This first HTML exercise has quite specific step-by-step instructions to help you to create your HTML page. This is partly because automatic grading sets requirements to the final HTML, but also because for some of you this will be one of the first HTML pages ever written. The target is to write valid and semantic HTML right from the beginning, and to stress this you will lose points if your HTML does not pass validation.
Note: If you are more experienced, following these steps is optional, however note that the instructions contain information which is not readily available in the image above. Only the final HTML will be required in the assignment submission
1. Download the files mentioned above and save them in an empty directory. Create an empty html-file where you have only the DOCTYPE, <head> and <body> sections and nothing else. Save the file in the same directory where you downloaded the files.
2. Add a character set definition (<meta> tag) inside the head section and add also a <title> tag which has the contents “Most Amazing Lasagna Recipe”. Use “utf-8” encoding. Next copy and paste all of the contents of the text file inside the <body> of the document. Save the document and open it up in a browser. A browser will reduce all continuous white space to single space and your page will initially look like one extremely long line of text without any additional structure or line breaks.
3. Now is the time to validate your page for the first time and make sure you haven’t made any mistakes so far. (https://validator.w3.org/) Correct any errors before continuing.
4. After validation you can start by identifying different headings (<h1>, <h2>, <h3>, and so on) from the text and marking them appropriately. See the image above for visual hints. There should be one level 1 heading and two level 2 headings and one level 3 heading. The main heading of the page should be the first thing inside the body. Again you should check your changes in the browser and validate the page before continuing.
5. Next identify any paragraphs and lists in the text. For now, leave the lists in tact and mark up all paragraphs with <p> tags. Do not use any <br> tags in place of line breaks. In this exercise all the text is inside paragraphs and some of them are shorter than others. There should be about 6-7 paragraphs. Remember to check the changes in a browser and validate the page again before continuing.
6. Now is the time to mark up those lists. One is unordered and the other is ordered (<ul> and <ol>). Identify each and use appropriate HTML for both of them. Remember that in ordered lists you don’t have to number the list items yourself so you can let the browser do it for you. Again check your progress in the browser and validate everything before continuing.
7. Your page is already starting to resemble the example page shown in the image. Next see the picture above and identify the emphasized part of the first paragraph. It is shown in italics in the picture, but that is only because of the default styling of the browser. Later on in this course you will learn how to change that but for now the default styling is fine. In your HTML emphasize that text with <em> tags. Then find text that has a strong emphasis and is shown in bold in the image above. Find those in your document and give them strong emphasis with <strong> tags. Again the bold font is only a default styling that can be changed with CSS styles and more important is the emphasis implied by the tag. HTML is not about the visual style and looks of the page but the structure. Again, when you’re done, see your changes in the browser and validate before moving on.
8. You may have noticed two asterisks (“*”) in the document text. Find them and mark them both as superscript <sup>. See your changes in the browser. Next take the latter <sup> and give it an id attribute with value “wine”. Note 1: The id must be exactly “wine” all lowercase because the automatic grading of this assignment will not find it otherwise. Note 2: In the image above there are numeral ones in place of those asterisks. You can either leave the asterisks in the document or change them to numeral ones (“1”) if you so choose. Again check your changes and validate the document.
9. It is time to link the first superscript in the previous stage to the second one. (Remember the id you gave to the latter.) Let’s start by enclosing the first <sup> with an anchor/link tag <a> and point that anchor/link to the id of the second <sup> (use href-attribute) Now you should have a link within the page that links your first superscript to the second one. Again check your changes in the browser and validate.
10. Finally add the copyright notice. Take the URL address and put it in the href attribute of an anchor tag a to make a link to the original source of the recipe. The last step is to change the “(C)” in the text to a proper character entity reference for the copyright symbol. The symbol must be inside the link and part of the link text. You can find the correct entity reference from (https://www.freeformatter.com/html-entities.html or https://www.toptal.com/designers/htmlarrows/symbols/) Note: Do not use the actual copyright symbol/character although it is allowed in utf-8. The point of this exercise is to learn to use character entity references. Check your changes in the browser and validate.
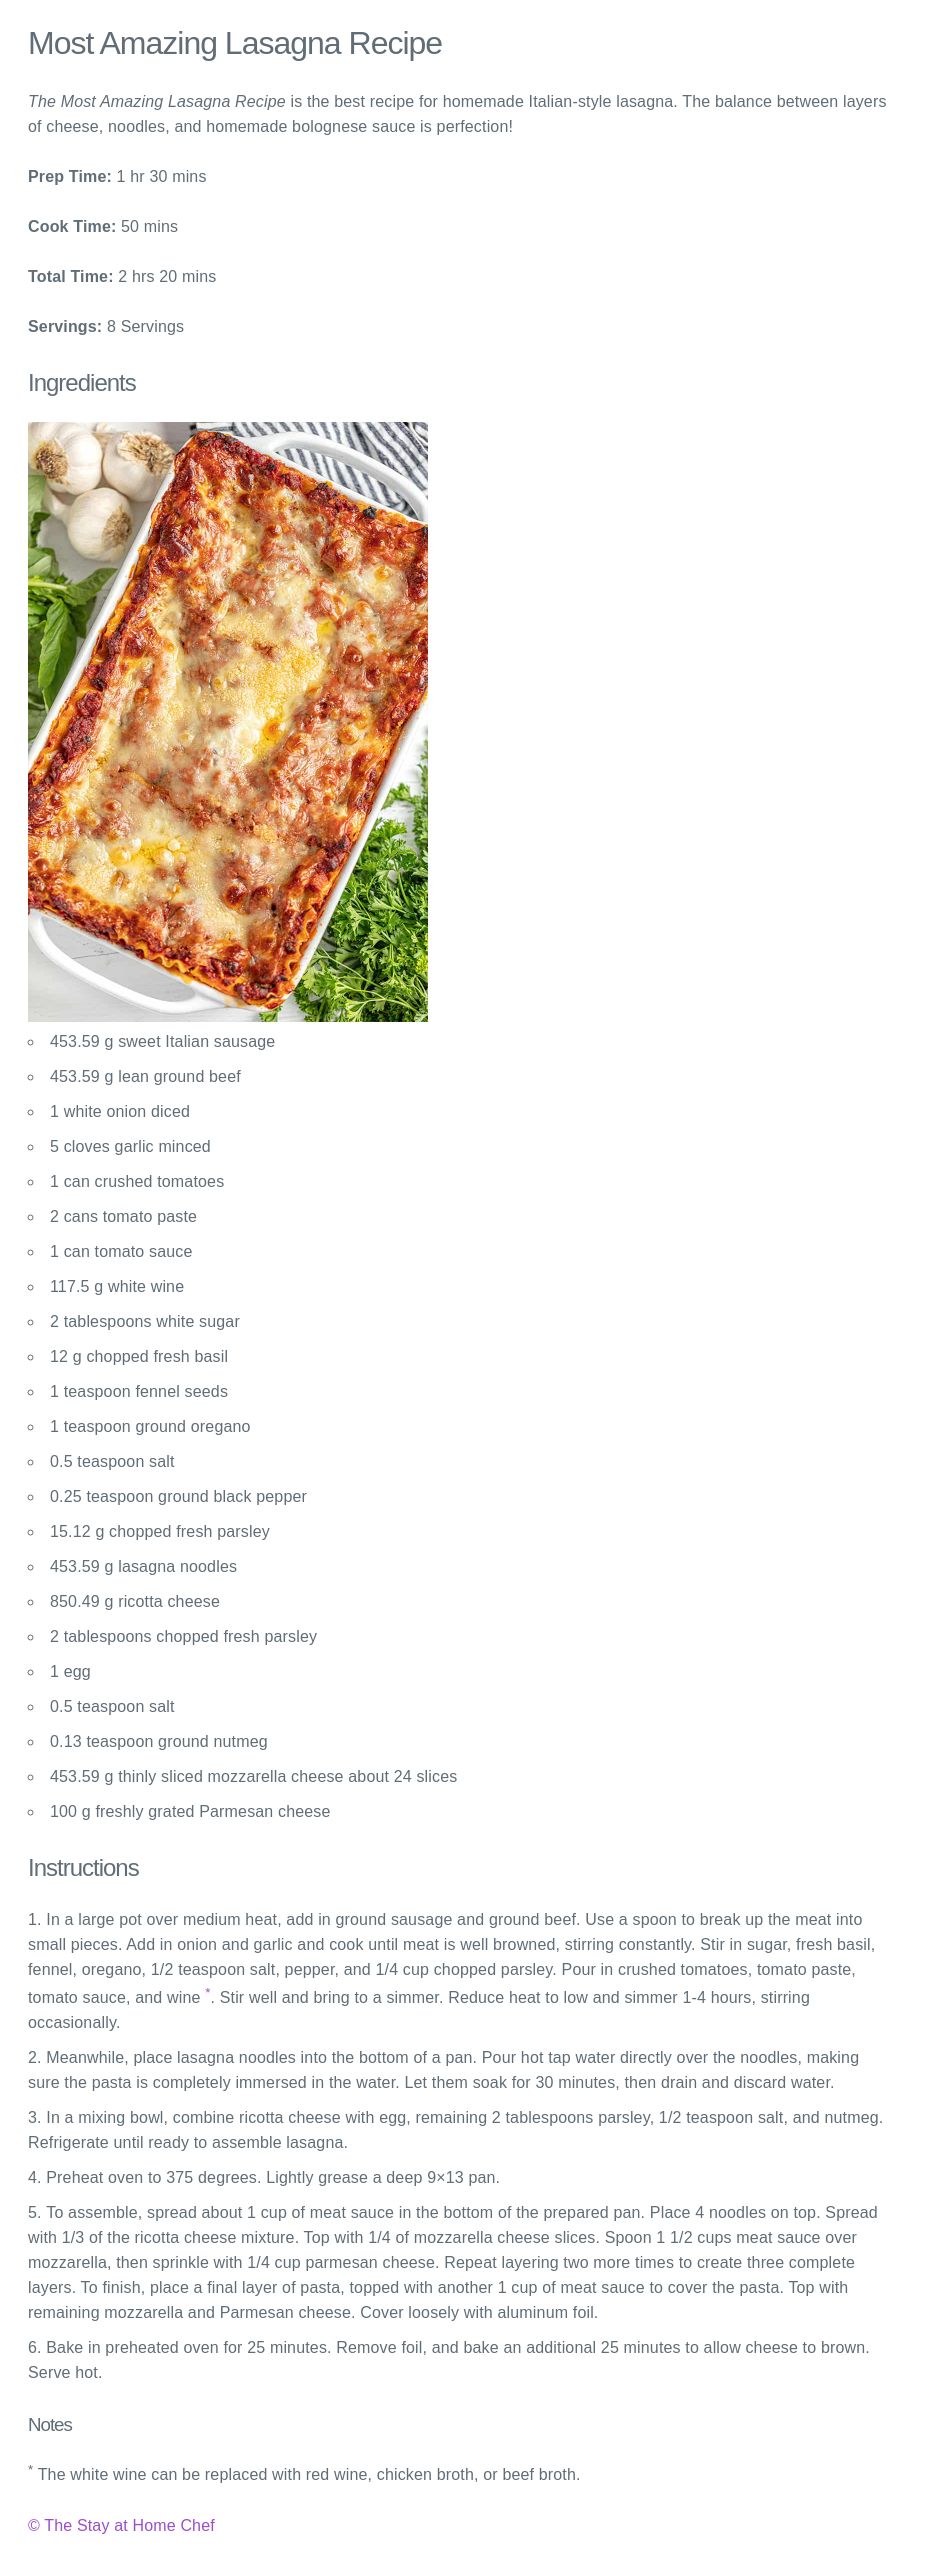
11. Let’s make the finishing touch to the document and add the image and stylesheet. First add the image (<img> tag). Do not forget to give the image an alt attribute with value “lasagna” or “image of lasagna” etc. or the page will not validate correctly. You are almost ready. Now link the stylesheet to the document and validate again. Your finished page should look like the picture below. Notice how the stylesheet can change the look and feel of a page without changing the HTML.
12. Congratulations! You are now finished. Before submitting your solution double check that everything is in order and validate the document one final time. Then submit only the HTML file you created.
Your page should now look like this:
A+ presents the exercise submission form here.