Setting file rights
linux-desktop.tuni.fi is a server for several users at the same time.
Thus, it is important to take care that other users cannot
access your personal files.
Attention
In new environments, settings have been made ready at creation. If you have not modified them, you need not do anything (not even read the rest of the section). Therefore, this section gives only general education about the topic that can be important in other contexts (outside this course).
By using command line, you can prevent the access of other users,
for example, as follows.
The command ls -l lists the content of directory and the access
rights of each file and subdirectory in the directory.
The command chmod 700 <directory> enables you to change the access
rights to the directory <directory>.
For example (when unessential parts have been replaced with [...]):
> ls -l
drwxrwxr-x. [...] ohj2
> chmod 700 ohj2
> ls -l
drwx------. [...] ohj2
In the example above, the rights drwxrwxr-x were changed to
drwx------.
Here d means directory, r reading rights,
w writing rights, and x execution rights.
Moreover, - means that there is not the right in question.
The first rwx part (some of the letters can be replaced with -)
means the rights of the user themself, the second part the rights of the
group, and the third part the rights of other users.
The result after the above commands is such that the user themself has
all the rights, and other users have no rights.
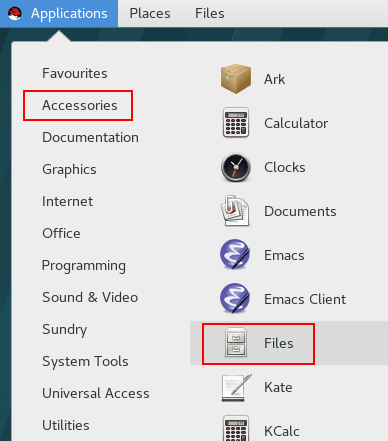
Alternatively you can change the rights by startint file system management
by selecting Accessories -> Files:

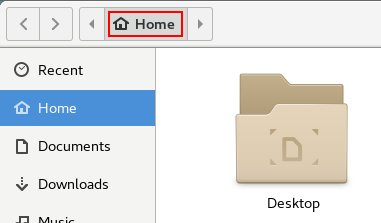
Make first sure that other users have no rights to the files in your home directory. Click Home icon with the right mouse button.

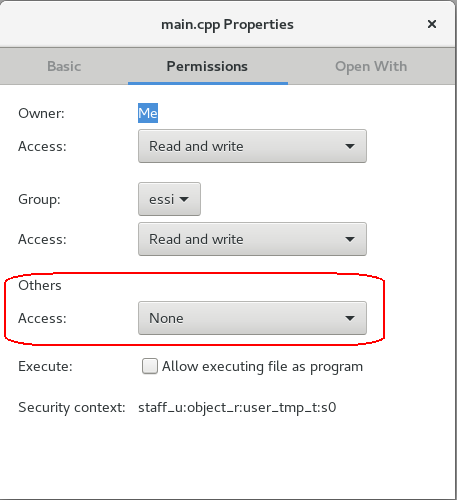
Choose ”Properties” from the menu opened and move to tab ”Permissions”.

Set ”None” for other users rights.
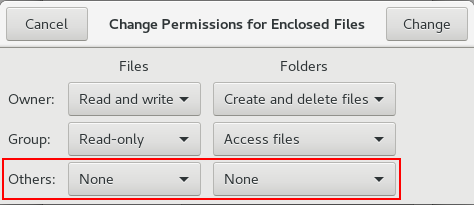
Click ”Change Permissions for Enclosed Files …” to change the rights of all files and directories in your home directory.

Set again ”None” for other users, both for files and directories.
This setting has no effect on files and directories that will be created later. However, if a directory has been protected from other users, all the files and subdirectories of it are also in safe.
At this point, you can create a directory for the assignments of the course and prevent other users to use the directory.
If suspect that you did not succeeded in changing the rights via the
file system management, you check the situation with the command ls -l.
If you want to learn more about file rights, you can use keywords ”linux chmod” or ”linux set umask”.